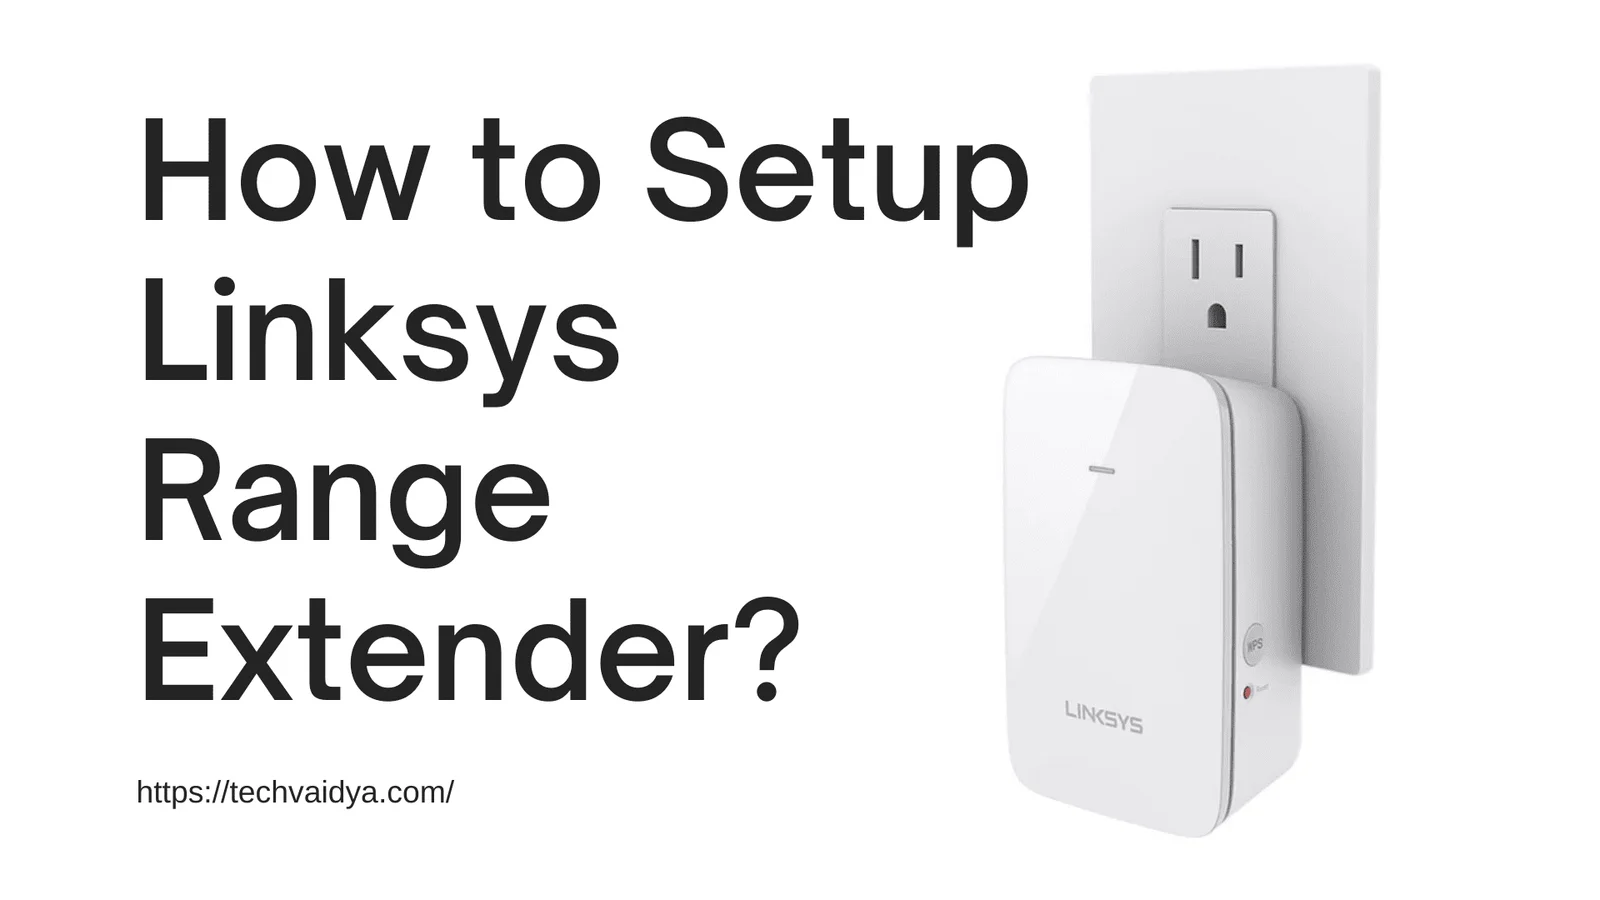
extenders are also known as Wi-Fi extenders or Wi-Fi boosters. The extender can be placed between the main router of the network system and the access point. It acts as a repeater and rebroadcasts the Wi-Fi signal.
Various companies like Linksys, Xiaomi, TP-link, Netgear, Tenda, and D-link are the manufacturers and suppliers of range extenders in the market. Linksys range extenders are well known for providing high-end features at a budget-friendly cost.
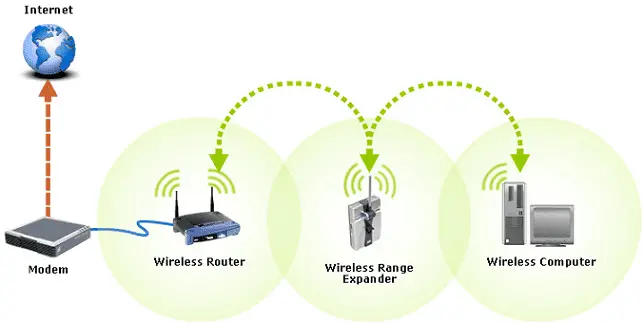
Multiple users reported that they are unable to set up their range extender device in the network. It is very easy to configure the Linksys range extender in the network; it doesn’t require any additional software.
This article is a one-stop guide that provides step-by-step instructions to set up a Linksys range extender in the network. Linksys range extenders can be configured in the WPS method and Manual Method.
Before setting up the Linksys range extender user should take the range extender, router, or access point in the same room. Users also have the network password credentials; and network SSID with them before executing the steps given in the following methods.
in our Previous Post, you can find How to log in Linksys router and troubleshoot its problems.
Contents
Setup Linksys range extender Manually
As the name implies, users need to perform some things manually while setting up a Linksys range extender by manual method. Users need to follow the given steps to configure the Linksys range extender in their network.
- Turn on the Linksys range extender device and make sure that the power LED on the range extender glows.
- Make a connection between the access point (computer/laptop) and range extender with the help of an Ethernet cable or wireless network.
- Open a web browser from your computer system. Type IP address 192.168.1.1 in the URL box and hit the enter button. Users can also enter http://extender.linksys.com in the address bar instead of typing the IP addresses.
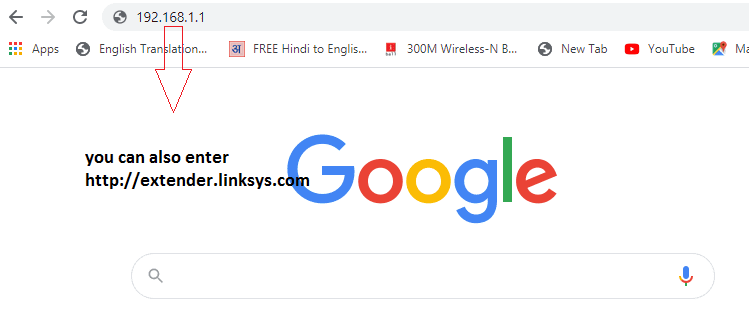
- It opens the setup page of the Linksys range extender on which the user can enter their user name and password to login to their range extender device. The users who are setting up the device the first time should keep the username field blank and enter the default password admin in the password field.
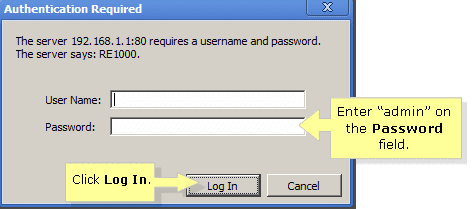
- Press the login button.
- Go to wireless-> Basic wireless setting.
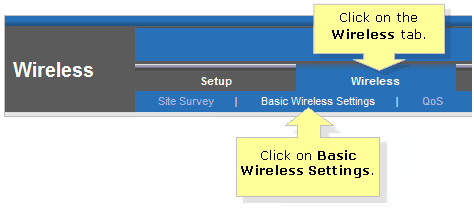
- In the Wireless setting, the user needs to select the method to set up the range extender from the manual method and Wi-Fi-protected setup. Select a manual method for configuring the range extender.
- Users need to enter the Network name and router SSID in the respective text box.
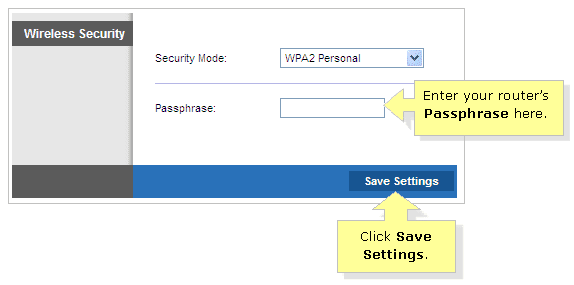
- Enter the password of your network.
- Click on save settings.
- After clicking on the save settings button. Users set the Linksys range extender on your network.
- Turn off the router and range extender then firstly turn on your router and range extender.
In this way, the user can configure the Linksys range extender using a manual method.
Setup Linksys range extender using the WPS method:
In the Wi-Fi-protected setup, the user can either press the WPS push button on the extender device or visit the page http://extender.linksys.com for the Linksys range extender configuration.
Users who are willing to configure their Linksys range extender with the help of the WPS button can follow the steps given below.
1. Turn on your router and range extender devices.
2. Make sure that your router and range extender devices are connected with the help of an Ethernet cable or wireless connection.
3. Press the WPS button present on the Linksys range extender device.
4. After this, the range extender will attempt for the WPS connection, at the same time user should press the WPS button present on their router unit.
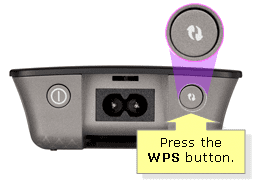
5. It will take a few seconds for the stable WPS connection to be established. Once the WPS LED present on the Linksys range extender glows and stables, your WPS connection is established successfully.
6. After this, the user can connect any client device to the range extender’s network.
This is a simple method for the Linksys range extender configuration. The user is unable to make any customized setting in the range extender by using the above method. The users who want to make customized settings while setting up their Linksys range extender should follow the steps given below.
Make Changes As you See fit
1. Turn on the Linksys range extender device and client device on which a user wants to connect their device. Users can establish the connection link with the help of an Ethernet cable or Wi-Fi mode.
2. Open the web browser from the computer system.
3. Visit setup page http://extender.linksys.com of the Linksys range extender. Users can also visit the same page by entering IP address 192.168.1.1 in the URL field of the web browser.
4. Enter your network credentials to get login into a range extender. After the login user can access the settings page of the range extender device.
5. Click on the wireless option and go to the basic settings.
6. It will ask the user to select the configuration method between the Manual method and the WPS method. Select the WPS method.
7. After this user can see the three options.
8. In the first option, Press the WPS button and then click on the image present on the right side.
9. If the client machine which you want to connect to the range extender is having the WPS pin then the user needs to enter the Pin of the client device and click on the register button.
10. When the client machine is asking for a router pin user can enter the router pin available in the third option.
In this way, the user can register client devices on the Linksys range extender. Users can also access the DHCP table of your router to check whether the range extender was successfully set up or not.
If the user can find the range extender device IP address in the DHCP table then the range extender is configured successfully. By using the Web-based WPS button method of the range extender setup user can set up one device at a time only.
We hope that this article assists users in configuring and setting up their range extender device in the network. In case the user is stuck somewhere in the above steps, the user can feel free to contact us.


